
With fall just around the corner (well, here in NYC at least), I wanted to create a fall wreath for my front door. So the other day, even though I didn't have any traditional wreath making supplies on hand, I got to work and created a Paper Bag Leaf Wreath. Let me show you how I did it:

1. I started with a paper grocery bag, a marker, some computer paper (left over from an older project), and a stapler.
2. I folded some of the computer paper in half and free-hand cut different kinds of leaves. I used photos on the internet for reference, but if you wanted your leaves to be more authentic there are lots of leaf templates you can print/use for free online!
3. I folded pieces of the paper bag (in an accordion style) and traced my leaf templates using the marker.
4. The reason I folded the paper bag was so I could cut several leaves at once, saving myself a little bit of time. In order to keep the paper bag folds together, I strategically stapled the bag around the leaves I traced.

5. In no time at all I had a pile of leaves cut and ready to go!
6. Of course, leaves in the fall aren't plain brown, so I filled up my palette with paint and got to work.
7. To get a realistic, mottled look (like real leaves turn in cooler weather) I dipped my foam brush in a variety of colors and messily swirled the paint over each leaf.
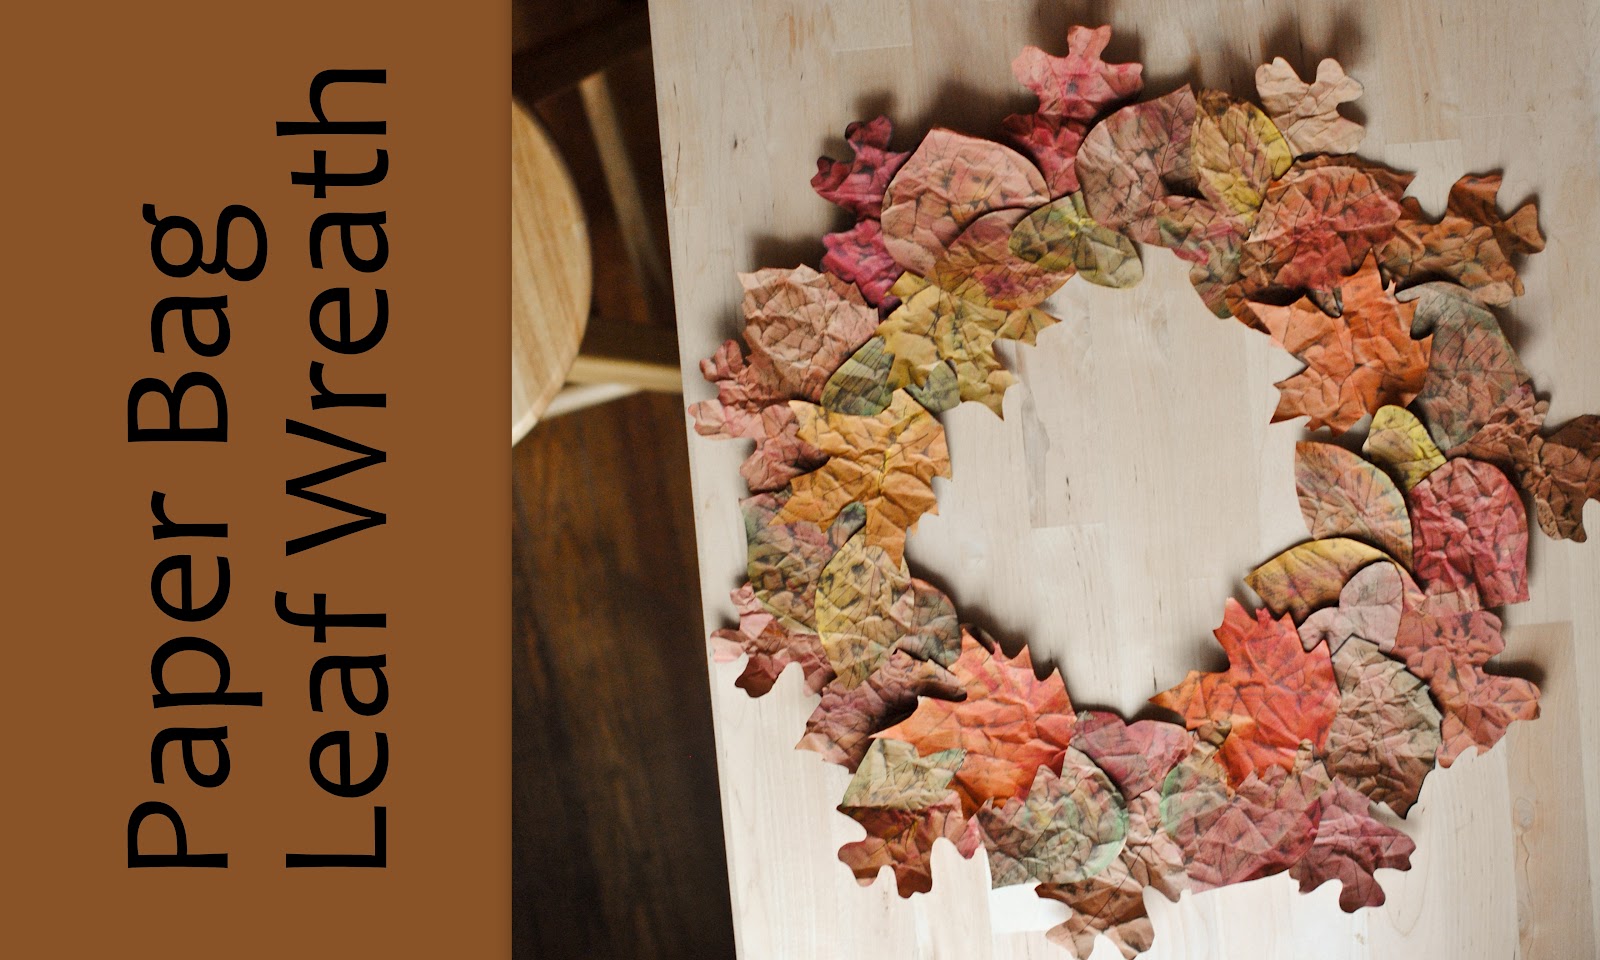
8. Once the leaves were dry, I crumpled them into balls and then smoothed them out again to get a bit of texture.

10. Starting with one layer of leaves, I spaced them out before I hot-glued them onto the cardboard circle. I gradually added more and more leaves until I liked the look of the wreath and the cardboard circle was no longer showing through the leaf layers.
11. When I was done gluing the leaves, I flipped over the wreath and added a few circles of painter's tape so I could hang my new wreath. Since the whole thing was made from paper, it was very light and the tape was all I needed to hang my new decoration!

Oh, and there were two more steps that I took to make my leaves look more authentic! First, I took a dark brown ink pad and lightly rubbed it along the top of the leaves. By doing this, the wrinkles in the paper picked up the ink which added a bit of contrast and texture! Then I grabbed a fine tipped brown marker, and drew lines simulating leaf veins along each of the leaves.

And that was all it took to create my new wreath! I'm really pleased with the way it turned out, especially because I was able to make it for FREE! I had all of the art supplies in my stash (paint, hot glue, markers), and everything else came out of the recycling bin (grocery bag, scrap cardboard, computer paper)!

What do you think? Even in the less-than-perfect lighting of my hallway, the wreath adds a bit of autumnal fun to my front door! Do you use paper bags, or any other "free" supplies in your crafting? Do you have any fall craft projects in the works?
Paper Bag Leaf Wreath SUPPLY LIST
Paper bag from the grocery store (Free!)
Stapler/staplesScissors
Scrap computer paper
Foam paint brush
Scrap cardboard
Hot glue gun
Painter's tape
This turned out absolutely gorgeous! love it! I wonder how it would look with newspaper? That could be neat!
ReplyDelete