It happened. I jumped onto the "ombre train!"
You see, I was trying to come up with a simple (aka cost-effective), homemade Valentine's Day treat for my co-workers. I remembered that I had a box of pencils I had picked up from the dollar-store, so I decorated them with some supplies I had in my craft stash to make these Valentine's Day Ombre Pencils.
1. The main reason this project was so cost-effective was because I already owned everything I needed to make these pencils: mod podge, glitter, pencils, acrylic paint, and a foam brush.
2. I started by setting out my paints: white, two shades of pink, and red.
3. I painted the pencils white to begin with, sort of like a blank canvas.
4. Once the base coat was dry, it was time to begin the ombre painting. Starting with the lightest shade of pink, I started painting sections of the pencil, ending with the darkest shade (red) near the eraser. I blended the different sections of color together with the wet paint brush.
And in no time, my pencils were painted.
Once the paint had dried, I painted a thin coat of mod podge on each pencil as a top coat.
5. But I wasn't done quite yet! When the mod podge had dried, it was time for the glitter! I squeezed some tacky glue on the metal portion of the pencils- you know, the thing that holds the eraser on the pencil!
6. Then I sprinkled glitter all over the glue and let the pencils dry overnight.
And that's all it took to create these Valentine's Day Ombre Pencils. Simple and cute, right?
VALENTINE'S DAY OMBRE PENCILS SUPPLY LIST
Pencils
Foam paint brush
Acrylic paint
Mod podge
Tacky Glue
Glitter
I consider myself extremely lucky to have a craft area in my cozy NYC apartment! However, my craft area is also highly visible from almost every room in my apartment, so I strive to keep it as neat as possible (which is a tall order for someone like me). With that in mind, I wanted a way to tidy up the area where I keep all my markers and pens, so I whipped up these Painted Glass Canisters.
As a reminder, this is what the marker area looked like before this project... see that unsightly corner of junk at the far end of the picture? That's what I was tackling!
So, I rustled up the supplies:
- a random assortment of glass containers I had acquired from the dollar store/saved from the recycling bin/snapped up for 50 cents at a local thrift shop. (I didn't end up using the old wine bottle in the pic above since I couldn't squeeze any of my poor markers into it!)
- leftover paint samples that I purchased for a project a while back.
This project is embarrassingly simple. I cleaned my containers, and once they were thoroughly dry, I poured my leftover paint into them.
I swirled the container around until the paint had coated the inside surface of the container.
Yep, that's all it took... so simple, right?
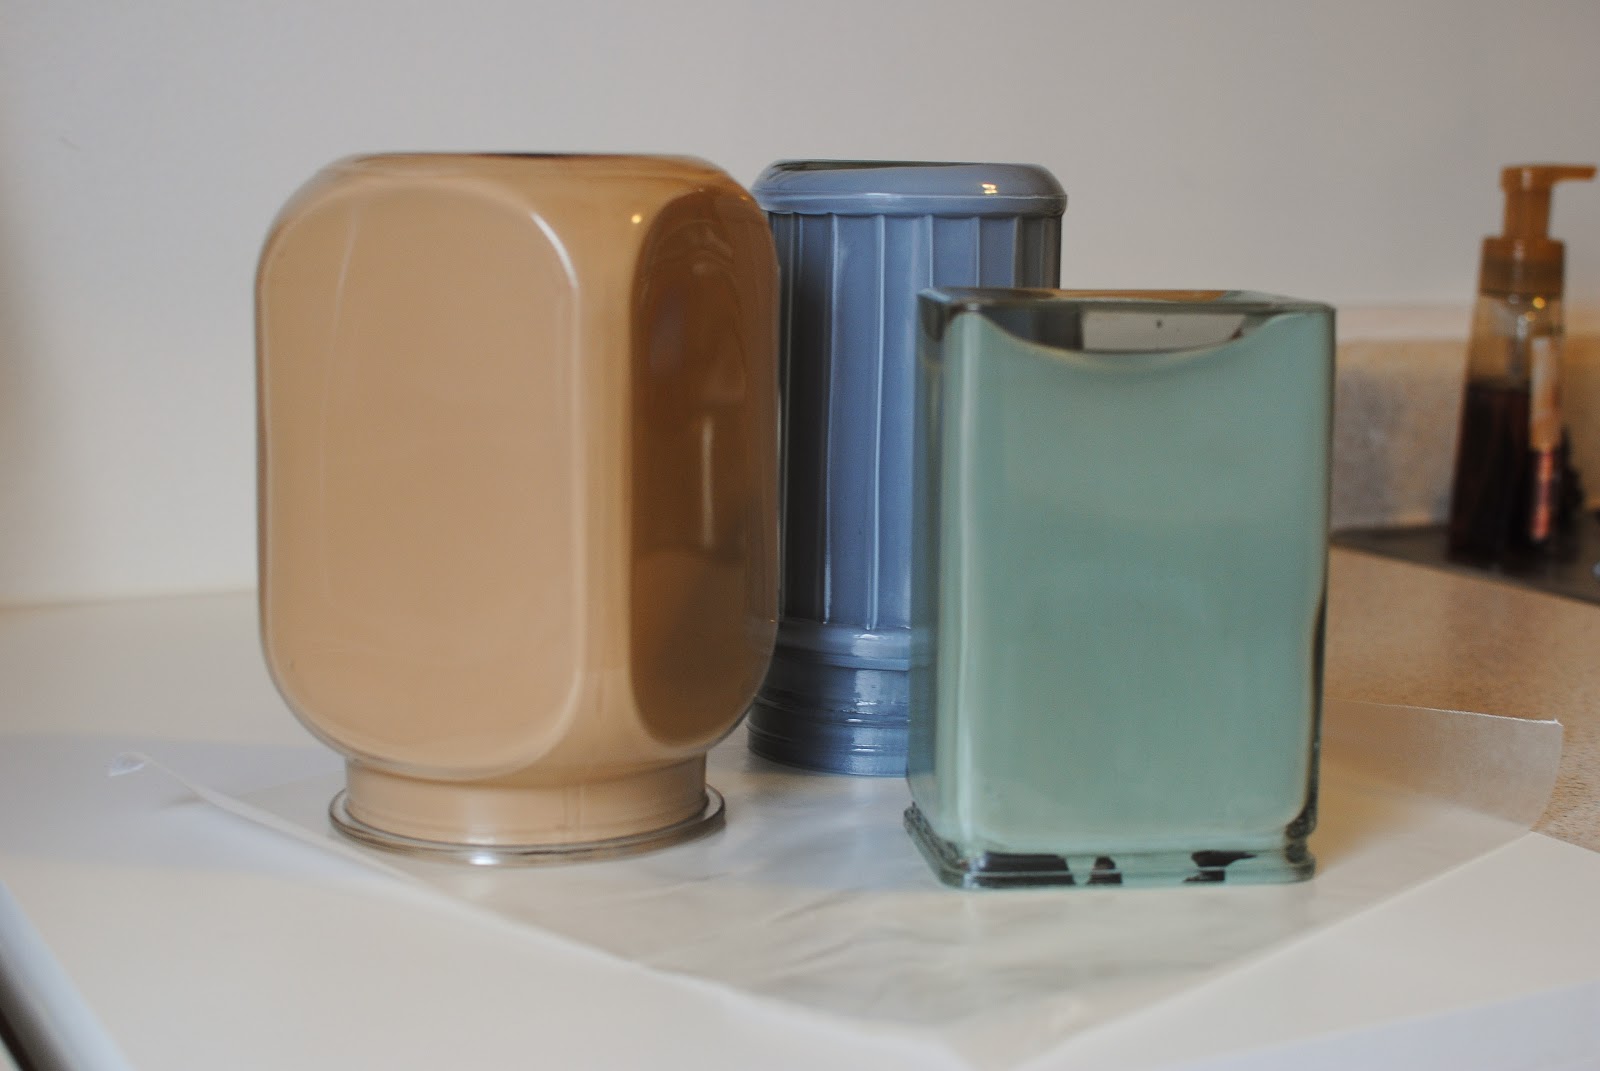
In order to allow the excess paint to drip out, while the paint was still quite wet I placed the containers upside down on a piece of wax paper for about 20 minutes. After that, I tipped them right-side up and used a wet paper towel to clean up the edge/lip of each container. Once the containers had the looks I wanted, I let them dry for a few days before filling them with the markers/pens I wanted to have on hand on my craft desk.
So much better than the "before" pic, right? Plus, the leftover paint samples I used were actually matched to the couch on the other side of the room, so these containers tie into the room's color-scheme...
There you have it: a cheap and simple way to dress up some glass canisters... AND a vast improvement on my craft area!
PAINTED GLASS CANISTERS SUPPLY LIST
Glass canisters
Paint (I used leftover wall paint samples)
Wax paper
Paper towels
I finally buckled down and tackled a project that has been on my "to-do" list for ages: this rustic, Embroidered Folk-Art Bird. I was first inspired by a something I saw tagged on Craftgawker, and after a quick trip to Prints Charming I was completely sold on idea of an embroidered hanging. So, I grabbed some supplies I had in my craft stash and got to work!
1. I used 5 different floss colors on this project, along with a "natural" colored piece of craft felt. I also used a small embroidery hoop (sorry about the obnoxious color!) and a tapestry needle. For my pattern, I sketched the design on a piece of paper using a permanent marker. The marker was a conscious choice: the thick ink line would keep me from getting the design too intricate, which I was worried I couldn't embroider since this craft is very new to me!
2. To get my patter on the felt, I taped the pattern to my window and held the felt against it... thanks to the sun it works just as well as my light box (and isn't as much hassle to get out of storage). Then I used a fabric marking pen (the ink dissolves when you wet it) and traced the design. Then I popped the felt into the hoop and started embroidering.
3. As I mentioned, I'm very new to embroidering, but I think the stitch I used is called Split Stitch.
4. And after what seemed like a very short time, I was finished with the embroidery- so I used a wet towel to dab the fabric ink away.
As you can see, the back side of the project isn't very pretty, but that part is no longer visible! Once the embroidery was done, I flipped the design over, folded the remaining felt in front of the design, and used my sewing machine to sew around the design.
I left a bit of the design un-sewn so I could flip everything right side out and stuff if full of fiber fill.
Once I was finished stuffing I whip-stitched the opening closed and my Embroidered Folk-Art Bird was finished.
Here's a close-up of the stitching - fun, right?
EMBROIDERED FOLK-ART BIRD SUPPLY LIST
Craft felt (I used a single piece of 9"x11"
Embroidery floss (I used 5 different colors)
Scissors
Tapestry needle
Design template (I used a marker and printer paper)
Fabric pen that dissolves in water
Sewing machine (optional)
Fiberfill
Embroidery hoop
With Valentine's day on the horizon, I had the urge to make a simple decoration for the romantic holiday! As you may have noticed, I prefer to make projects using materials I have in my craft stash, and this Glitter and Wire Decoration (LOVE) is no exception!
1. This simple project requires just three supplies: silver floral wire, glue (my preference is Tacky) and red glitter (I like the chunky stuff they sell in the kids aisle of the craft store for this project).
2. Using my fingers and a pair of needle nosed pliers (these are truly optional), I bent the wire to spell the word "LOVE." I didn't use a template for this part of the project, rather just my imagination (I pretended I was writing the word, and just bent/finagled the wire as necessary).
3. Once the wire was manipulated to my liking, I squeezed glue along the bottom half of the word. I then used my finger (again, cheap and easy folks!) to smear the glue in the crevices. I didn't want my decoration to be overly gaudy, so I was judicious with the glue.
4. Once I was satisfied that there was enough glue on the wire, it was time for the best part: GLITTER! I sprinkled glitter on the glue area, making sure not to leave a bald spot!
And after everything dried for a few minutes, my decoration was complete.
I decided to use from translucent thread to hang my word (I just tied the thread to the loop on the 'L' and the loop on the 'E')...
But it looks just as good resting against a jar of flowers! This is such a simple project, my mind is brimming with the possibilities of what else can be done with wire and glitter!
GLITTER AND WIRE DECORATION (LOVE) SUPPLY LIST
Silver floral wire
Glue
Glitter
Needle nosed pliers (optional)
Translucent thread (optional)
Before I get into this tutorial, I wanted to apologize for being MIA for the past few weeks. The holidays took over my life, but I'm happy to share that I'm finally back on track and can't wait to share all sorts of projects! And while I realize the holidays are long gone, I hope you'll indulge me as I share a project I made as a holiday gift...
One of my favorite things about the holidays is making gifts for family and friends. A good friend of mine has a fabulous apartment and is devoted to his french bulldog, so I whipped up this Kitschy Dog Pillow to add to his couch for the holidays.
1. The supplies were really simple: some cotton fabric (white for the front, and red/white stripes for the back of the pillow), green acrylic paint, and red rhinestones.
2. After a quick google search I found a french bulldog silhouette online, so I printed it off and taped it to my light box.
3. Then I placed the white fabric on top of the image, flipped on the light box, and traced the silhouette with a pencil.
4. Once the I had the outline traced onto the fabric, it was ready to paint! To keep the fabric taught as I painted, I taped it to a cereal box- can you tell I'm a fan of raiding the recycling bin for my projects?
Once I had painted the silhouette and let it dry, I sewed the pillow. I simply sewed the wrong sides of the pillow together, and sewed almost all the way around the edge, leaving an opening so I could stuff it later. Then I flipped the project right side out.
But before I could stuff the pillow, I wanted to add a bit of bling... so I grabbed the rhinestones, and using tacky glue and some toothpicks, I glued a "collar" of red rhinestones around the neck of the silhouette.
Once the glue had dried, I filled the pillow with fiberfill and whipped stitched the opening closed... and my friend's gift was complete.
I must admit, my friend loved this very personalized gift. This would make a great gift for any gift lover- the option of personalizing it based on the animal breed makes it a thoughtful present!
Kitschy Dog Pillow SUPPLY LIST
Cotton fabric (white and "holiday"- I chose a simple red and white stripe)
Fiberfill
Thread
Needle
Scissors
Acrylic paint
Paintbrush
Pencil
Animal silhouette
Rhinestones
Glue
Toothpicks